Enjoying your patio on a warm San Diego evening is one of life’s simple pleasures, but a still, hot night can make it less comfortable. An outdoor ceiling fan seems like the perfect solution, creating a gentle breeze to keep you cool. But choosing and installing one here is more complicated than just picking a style you like, especially with our coastal climate.
TL;DR
- Covered patios in inland areas need damp-rated fans; covered patios near the coast or any uncovered outdoor space needs wet-rated; choosing wrong voids the warranty.
- Salt air destroys standard outdoor fans within 2 to 3 years near the coast; look for powder-coated aluminum or polymer housings and marine-grade 316 stainless steel hardware.
- A fan-rated electrical box anchored to a structural beam is required; attaching to finish material (drywall or stucco) is unsafe and against code.
- Replacing an existing fan or light fixture runs $250 to $450 in labor; a new installation with new wiring runs $600 to $1,200 or more.
- Fan blades should sit 7 to 9 feet off the floor for effective air circulation; use a downrod to achieve that height on taller patio covers.
Damp-rated vs. wet-rated: which your patio actually needs
The first and most important decision is choosing a fan with the correct UL rating for your space. Using an indoor fan outside is a non-starter; its motor isn’t sealed against moisture and its blades are often made of materials that will warp and sag. For outdoor use, you have two choices: damp-rated or wet-rated.
Damp-rated ceiling fans are designed for covered outdoor spaces. Think of a typical covered patio, porch, or California room. These areas are protected from direct rain and sprinklers but are still exposed to humidity, moisture, and condensation. The fan’s motor is sealed to prevent moisture from getting in, and the blades are made of weather-resistant materials like ABS plastic. If your patio in an inland area like Poway or Escondido is fully covered, a damp-rated fan is usually sufficient.
Wet-rated ceiling fans are built for direct exposure to the elements. They can handle rain, snow, and even being hosed down for cleaning. Every component, from the motor housing to the mounting hardware and blades, is completely waterproof. You need a wet-rated fan for any location that isn’t fully protected from above, such as a pergola, gazebo, or an uncovered deck. Even in a covered patio in a coastal area like La Jolla or Encinitas, where fog and driving rain are more common, a wet-rated fan offers an extra layer of durability and peace of mind.
Choosing the wrong rating can lead to a shorted motor, rusted components, and a voided warranty. When in doubt, it’s always safer to choose a wet-rated fan.
Coastal corrosion: why most outdoor fans fail in 3 years
Living in San Diego County means dealing with a unique and persistent enemy of all things metal: salt air. The marine layer that rolls in carries microscopic salt particles that settle on every surface, accelerating rust and corrosion at an alarming rate. This is the secret killer of outdoor ceiling fans.
Many homeowners buy a standard “outdoor” fan from a big-box store, only to find it covered in rust pits, with a wobbling imbalance and a failing motor within two or three years. That’s because the fan wasn’t designed for a coastal environment. The salt corrodes the finish, attacks the steel motor housing, and seizes the bearings. Even stainless steel hardware can show signs of “tea staining” or surface rust if it’s not a high-quality, marine-grade alloy like 316 stainless steel.
When you’re shopping, look for fans specifically marketed as “coastal,” “marine-grade,” or “weather-resistant.” These fans use materials designed to withstand the salty air.
- Housing: Look for powder-coated aluminum or high-grade polymer housings.
- Hardware: All screws, brackets, and fasteners should be marine-grade (316) stainless steel.
- Blades: All-weather ABS composite blades won’t warp, droop, or degrade from salt and sun exposure.
Investing in a fan built for coastal conditions costs more upfront but saves you the expense and hassle of replacing a rusted-out fan every few years.
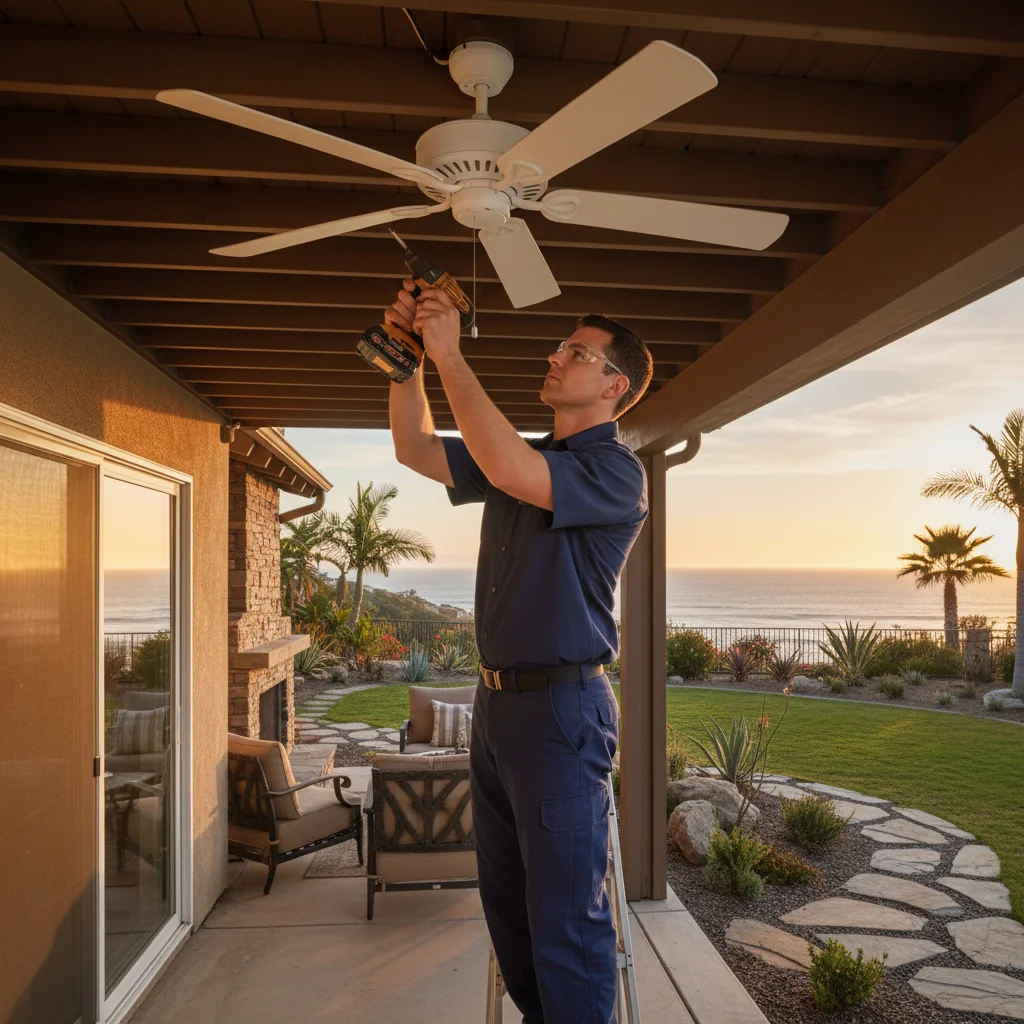
Beam mounting, downrods, and ceiling height
Proper installation is just as critical as choosing the right fan. An outdoor fan needs a secure mounting point that can handle the weight and dynamic forces of the spinning motor. This is not a place to cut corners.
The electrical box the fan attaches to must be specifically “fan-rated.” This means it’s designed to support the extra weight and vibration. On most San Diego patio covers, we mount these boxes directly to a solid wood beam or joist. If your patio ceiling is finished with stucco or drywall, we’ll need to locate a structural member to anchor the box to. Simply attaching it to the finish material is unsafe and against code.
Ceiling height is another key factor. For optimal air circulation, the fan blades should be between 7 and 9 feet from the floor.
- Low Ceilings (8 feet): A “hugger” or low-profile fan that mounts flush to the ceiling is the best choice to maintain safe head clearance.
- Standard Ceilings (9-10 feet): The small downrod included with most fans (typically 3-6 inches) usually works perfectly.
- High or Vaulted Ceilings: For taller patio covers, you’ll need a longer downrod to lower the fan into the effective zone. Downrods come in various lengths, typically from 12 to 72 inches.
Using the correct downrod ensures the fan can move air efficiently instead of just spinning uselessly high above your head. It also helps stabilize the fan and prevent wobbling on angled ceilings. Once it’s up, make sure you’re running it counter-clockwise in summer. Our guide on ceiling fan direction for summer and winter covers the setup and how to find the reverse switch.
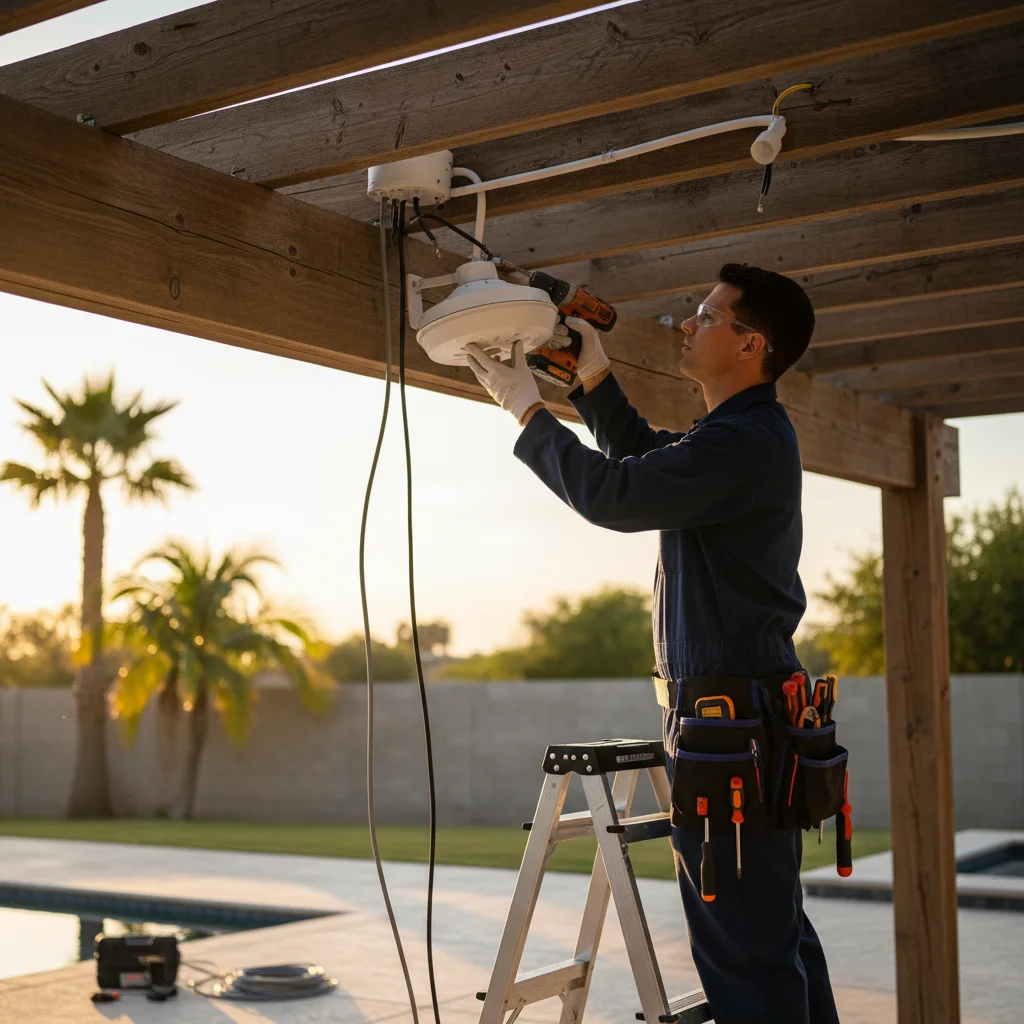
Wiring a covered patio without an existing box
What if your perfect spot for a patio fan doesn’t have any existing wiring or a light fixture? This is a very common situation and one that absolutely requires a licensed electrician. Creating a new circuit for an outdoor fan involves more than just connecting a few wires.
The process typically involves:
- Identifying a Power Source: We’ll find the safest and most logical power source, which could be an existing outdoor outlet, an interior circuit, or a direct run from your main electrical panel.
- Running Conduit: All outdoor wiring must be protected. We’ll run electrical conduit from the power source to the fan’s location. This conduit protects the wires from physical damage, UV rays, and moisture. On a patio cover, this is often run discreetly along the top of beams.
- Installing a Switch: You’ll need a way to control the fan. We’ll install a new wall switch in a convenient location, often near the door leading out to the patio. This switch must be GFCI-protected for safety in an outdoor environment.
- Mounting the Fan-Rated Box: As discussed, we’ll securely install a new, fan-rated electrical box to a structural beam, ensuring it’s ready to support your fan.
This is similar to the work we do for new outdoor landscape lighting systems and requires a deep understanding of the National Electrical Code (NEC) to ensure the installation is safe, weatherproof, and reliable.
Cost to install in a San Diego outdoor space
The cost of an outdoor ceiling fan installation can vary significantly based on the fan you choose and the complexity of the job.
First, there’s the cost of the fan itself. A basic, damp-rated fan might cost $150-$300. A high-quality, wet-rated, coastal-grade outdoor ceiling fan with light can range from $400 to over $1,500 for premium models from brands like Big Ass Fans.
For the professional installation, here’s a general breakdown for San Diego homeowners:
- Replacing an existing fan or light fixture: If you have a properly wired, fan-rated box already in place, this is a straightforward swap. You can expect labor costs to be in the $250 to $450 range. This covers removing the old fixture, assembling and installing the new fan, and testing everything.
- New installation with new wiring: If there’s no existing box, the job is more involved. The cost will depend on how far we need to run wire, the type of construction (wood vs. stucco), and whether a new circuit is needed. For a new installation, expect the cost to be between $600 and $1,200 or more.
For more details on the factors that influence pricing, you can read our general guide to ceiling fan installation costs in San Diego. Always get a firm quote from a licensed electrician. You can check any electrician’s license status on the California CSLB website.
Brands that hold up in salt air
When you’re investing in an outdoor fan for your San Diego home, choosing the right brand makes all the difference. Some manufacturers are simply better at building products that can withstand our coastal environment. Here are a few that we regularly install and trust:
- Hunter: A classic for a reason. Hunter’s “WeatherMax” line is specifically engineered to be corrosion and salt-air resistant. They are UL wet-rated and feature powerful, quiet motors. They offer a great balance of performance, durability, and traditional style without a premium price tag.
- Modern Forms: If you’re looking for a sleek, contemporary design with smart features, Modern Forms is a top choice. Many of their fans are built with marine-grade stainless steel and reliable finishes. They integrate with smart home systems like Alexa and Google Assistant, allowing you to control fan speed, light, and direction from your phone.
- Big Ass Fans: The name says it all. These are premium, high-performance fans built with industrial-grade materials. They are engineered for maximum air movement and efficiency, and their durability is unmatched. While they are a significant investment, they come with long warranties and are designed to last for decades, even in the harshest coastal conditions.
While you might pay more for these brands, you’re buying a fan that will perform well and look good for many years, saving you from the cycle of replacing cheap fans every few seasons.
Frequently asked questions
Do I need a wet-rated fan or is damp-rated enough for my San Diego patio?
If your patio is fully covered and you’re in an inland area like Poway, Escondido, or El Cajon, a damp-rated fan is sufficient for normal humidity and condensation. If your patio faces the ocean, sits in a coastal neighborhood like Encinitas or La Jolla where fog and driving rain are common, or is only partially covered, a wet-rated fan is the right choice. When in doubt, wet-rated is always the safer option and usually only costs $50 to $150 more per unit.
Why do outdoor fans fail so quickly near the San Diego coast?
Salt-laden marine air settles on all outdoor surfaces and accelerates corrosion significantly faster than inland environments. Standard “outdoor” fans from big-box stores use steel motor housings, standard zinc alloy hardware, and aluminum blades that corrode or pit within a few years in coastal conditions. Look specifically for fans marketed as coastal or marine-grade, with powder-coated aluminum or polymer housings and 316 stainless steel fasteners.
Can I install an outdoor ceiling fan myself if there’s already a light fixture there?
If there’s an existing fan-rated electrical box properly secured to a structural member, swapping in a new fan is something many homeowners do successfully. The critical check is confirming the box is fan-rated (it will be labeled) and anchored to framing, not just the finish ceiling. If you’re unsure, or if the existing box is just a standard light fixture box, a licensed electrician should inspect it before installation. A ceiling fan creates constant vibration that standard light boxes aren’t rated to handle.
How much does it cost to add a new wired outdoor fan on a patio with no existing outlet or wiring?
Expect $600 to $1,200 or more for a new installation that includes running conduit, pulling wire from a power source, installing a fan-rated box on a structural beam, and adding a control switch. Homes with limited attic access, stucco exteriors, or long conduit runs trend toward the higher end. The fan fixture itself is separate and can range from $150 for a basic damp-rated unit to $1,500+ for a premium coastal-grade model.
When to call us
Installing an outdoor ceiling fan, especially when it involves new wiring, is a job for a professional. It requires working with electricity in an outdoor environment, ensuring proper structural support, and meeting all local and national electrical codes. For a safe, reliable, and beautiful installation that will last for years, leave it to a licensed electrician.
Our ceiling fan installation service covers both indoor and outdoor installs across San Diego County, including patio covers, pergolas, and California rooms.
Call us at (858) 988-5580 for a same-day estimate.